
Summary
Focus on coolant change
Step 1: Install the equipment
Step 2: Drain the coolant
Step 3: Purge air residue
Step 4: Reactivate the cooling system
Step 5: Cooling system maintenance
Step 6: Filling and bleeding
The coolant is used to prevent the engine from overheating during operation. Also known as antifreeze, it circulates in a closed circuit from the radiator to the engine. When it is in operation, it causes losses that must be made up if necessary. Here’s how to change your vehicle’s coolant.
Focus on changing the coolant
The coolant must be changed several times during the life of a car. Over time and use, the coolant oxidizes and becomes less efficient. If the coolant no longer does its job, the engine will overheat and damage such as a broken cylinder head gasket can occur.
The manufacturer recommends replacement intervals according to these models and engines. It is therefore advisable to refer to the vehicle’s manual or ask a dealer for recommendations.
Generally, it should be changed at least every two years and at most every four years.
Supermarkets, car specialists, the Internet, etc., you will find coolant at all prices.
1. Install the equipment

– Park your car in a flat, ventilated parking area.
– Make sure you have lighting.
– Open the bonnet of your car and hold it in place with the locking bar provided.
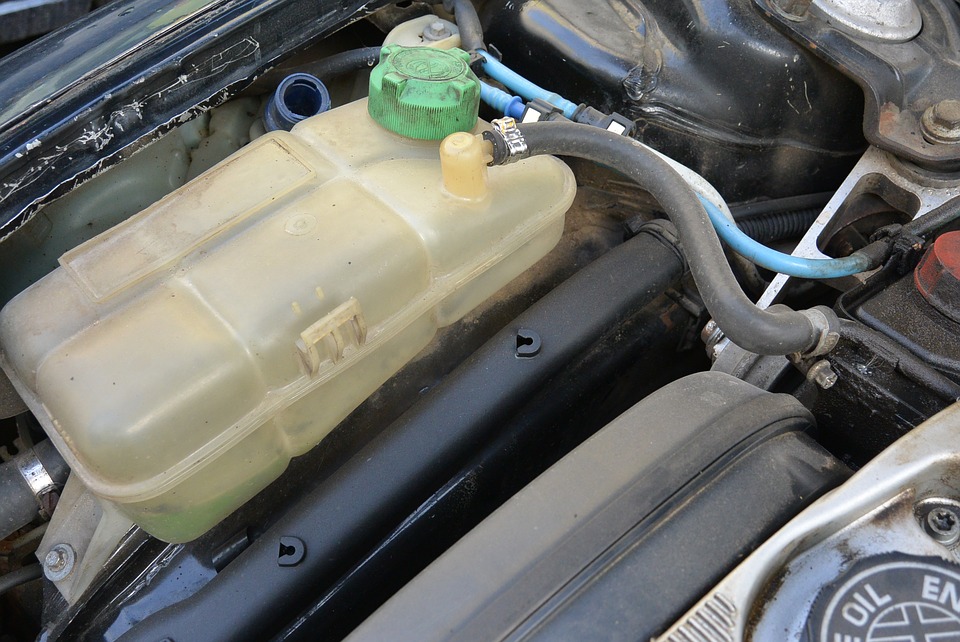
– Mark the tank with a cap with the symbol of a radiator or with a specific shape.
– Locate the drains that are usually located on the engine radiator or thermostat or a hose (usually the highest).
– If the trap is located higher than the maximum level of the jar, the operation will be simple; conversely, if the trap is located lower, it will require a little more work.
Note: You can run your car’s engine to warm up the liquid and drain it completely. To do this, turn on the interior heating and ventilation, and leave the engine running for a few minutes. However, be careful not to burn yourself.
2. Drain the coolant
– Locate the valve on the radiator (located at its base).
– Place the container underneath to collect the old liquid.
– Open the plugs on the radiator and the expansion tank.
– Operate the valve to expel the old liquid.
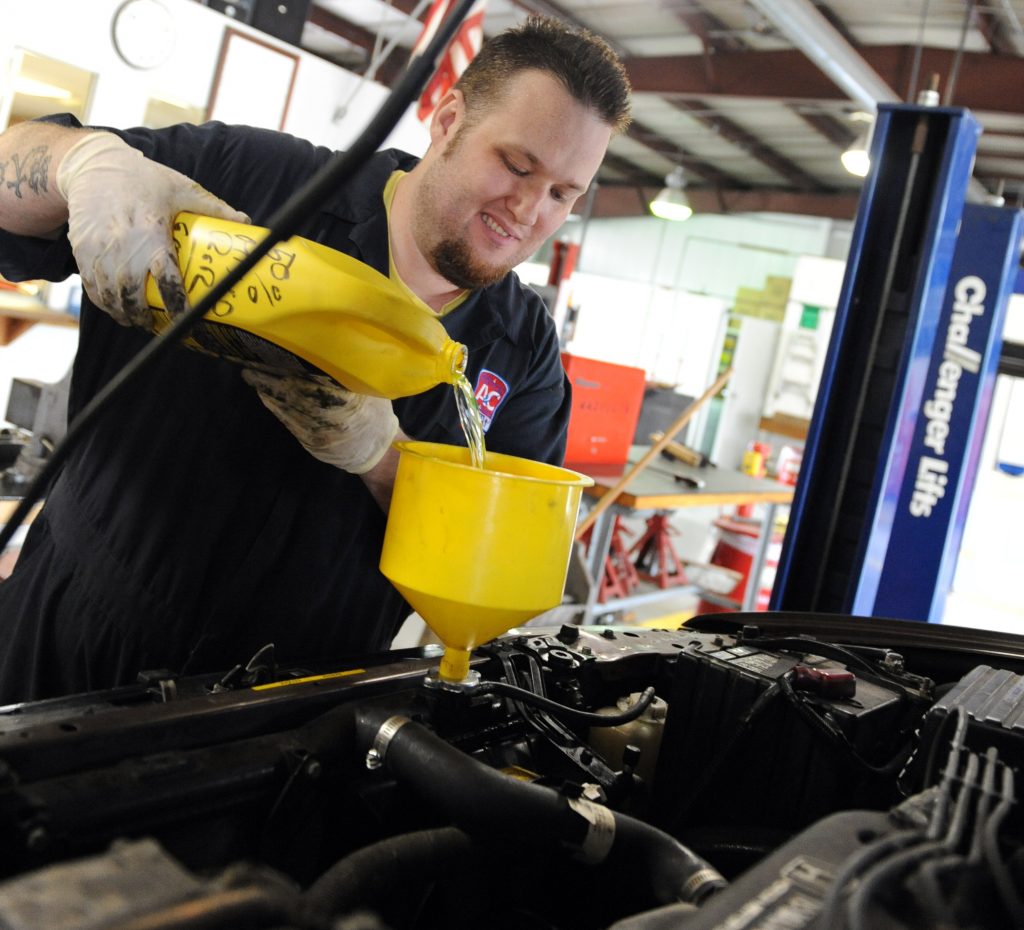
– Fill the tank with a new coolant to completely flush out the old liquid.
– Close the tap again.
3. Bleed off the residual air
– If the bleeder(s) (materialized by a screw) located on a hose are placed lower than the maximum jar level (which is often the case), open the jar and fill it up to the maximum line. The new liquid will flush out the old one.
– Place a cloth around the bleed screw and turn it to open it. Wait for the air to escape by making small bubbles and for the liquid to flow out continuously.
– Close the screw again and fill the level of the jar.
– If the bleeder is higher than the maximum level of the jar, the jar can be disassembled to raise the level. Once it is higher, proceed with the above steps.
– Once these steps have been completed, replace the jar.
– If your jar does not come apart, do not panic:
– Take a bottle of mineral water (1 l or 1.5 l), cut off the bottom.
– Then insert the neck of the bottle into the jar of liquid, making sure that it is tightly sealed with a cloth.
– Then proceed as described below.
4. Reactivate the cooling system
– Start your engine.
– After a few seconds, accelerate once.
– A few air bubbles may appear in the jar and the level may drop. Top up as you go to be always at the maximum level.
– Repeat the operation as long as air bubbles rise.
– If there are no more air bubbles, close the jar again (if you used a bottle, remove it and check the level, top-up if necessary).
– Let the motor run until the fan starts to work.
– Turn off the ignition.
– Carefully open the jar cap again to release the pressure.
– Top up the level if necessary.
– Close the lid and allow the coolant to cool for at least four hours.
– Check the level again and top up if necessary.
– Wipe off any traces of coolant with a cloth moistened with water.
5. Cooling system maintenance
In general, manufacturers recommend replacing the liquid every 2 years (also consider replacing the thermostat).
Check the tightness of the circuit:
This operation is important for the detection of possible leaks. The circuit must be pressurized with compressed air (max. 1.5 bars) and the condition of the entire circuit must be visually checked.
Draining the circuit:
After opening the expansion tank cap, open the drains, if any, of the engine block and radiator (otherwise remove the hoses at the lowest points).
6. Filling and bleeding
– Fill through the expansion tank by opening the air vents, if any, while ensuring that an amount equivalent to the drain is introduced.
– Run the engine at idle, monitoring the water temperature until the blower is activated.
– Stop the engine and allow it to cool, then top up the fluid if necessary.
Note: Each vehicle has its own specific procedure (for example, there may be hidden air vents); the only way to avoid making mistakes is to have the technical journal for your vehicle.
Even though the above steps have been explained to you in the simplest possible way, draining the coolant is not a piece of cake for many motorists. That’s why you can call Xtreme Motor Works in Kissimmee.