
Contents
Focus on brake fluid and soft brake pedal
Step 1: Access the bleed screws behind the wheels
Step 2: Prepare your car for the purge
Step 3: Determine wheel bleed order
Step 4: Bleed the wheels
Step 5: Check that your brake pedal is no longer soft
Step 6: Diagnose if the brake pedal remains soft
Your brake pedal’s gone soft. As you press down, the pedal gets deeper and deeper. Your car has difficulty stopping and braking distances get longer: there are probably air bubbles in your brake system. It needs to be vented.
So here’s how to bleed your brake system if you have a soft brake pedal.
Focus on brake fluid and soft brake pedal
The brakes are a very important safety feature on your vehicle. Any defect can be extremely dangerous.
You must act at the first symptoms of a malfunction.
Air bubbles in the brake fluid: danger!
When you depress the brake pedal, air bubbles can be compressed in the brake system.
They will therefore delay the transmission of the brake control to the wheels. This is dangerous.
Take prompt action
Sometimes “pumping” (pressing the brake pedal several times) will bring things back to normal, but this is only temporary.
To solve this problem, it is necessary to drain your brake fluid.
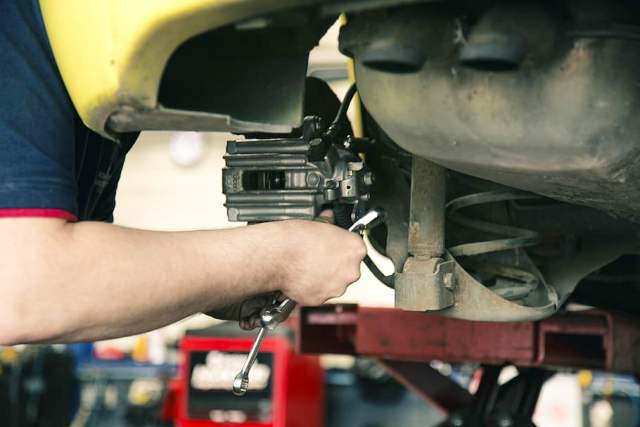
1. Access the bleed screws behind the wheels
To access the bleed screws on the brake calipers on all four wheels, there are 2 possible solutions.
Case 1: Access the bleed screws without removing the wheels
Turn the wheels of your vehicle to the maximum.
Slide under the car and access the bleed screws without removing the wheels.
Good to know: if this option is possible, it is preferable because it avoids putting the car on stands.
Case 2: Remove the wheels
It is sometimes necessary to remove the wheels to access the brake calipers and their bleed screws.
Place your vehicle on a flat surface with the handbrake on and one gear engaged.
Remove the wheel covers.
Loosen the wheel nuts by one turn, using a lug wrench or cross-wrench, to make removal easier.
Secure the opposite wheels (front wheels when removing the rear) with wheel chocks.
Remove each wheel and place a stand to hold the car.
Use a jack to lift the car, place a stand next to it, and place the car on the stand by loosening the jack a little.
Loosen the bolts completely and remove the wheel.
Do the same for each wheel.
2. Prepare your car for bleeding
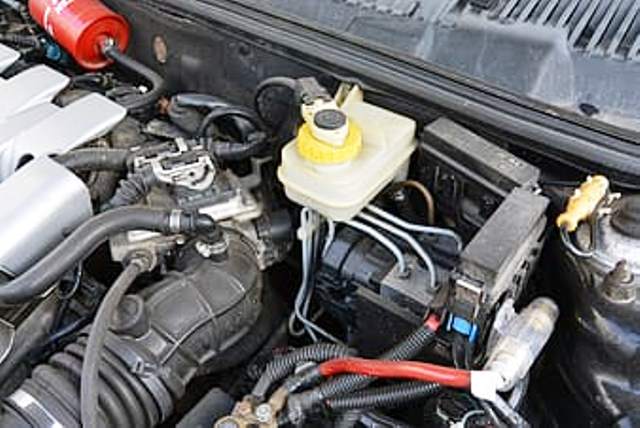
Fill the brake fluid jar
Under the bonnet, locate the brake fluid reservoir.
Good to know: located above the master cylinder, the jar is usually on the driver’s side and filled with dark fluid.
If necessary, remove as much of the old brake fluid as possible with a pipette, or syringe and replace it with new brake fluid.
In any case, before starting to bleed the brakes, make sure that the brake fluid reservoir is filled to the maximum.
If necessary, fill it with the brake fluid recommended by the car manufacturer. Refer to your vehicle’s technical journal for the exact reference.
Important: brake fluid is very corrosive. Be careful not to put any on the paintwork or plastics of your car, and of course on your skin. Wear gloves and carry a cloth with you.
Comply with your vehicle’s technical journal
For vehicles equipped with ABS, there is sometimes an additional manipulation to be done before bleeding the brakes (for example, disconnecting the battery). Be sure to check your vehicle’s technical journal before you start.
Important: If you empty the ABS circuit by mistake, take your car to a professional garage immediately!
For some cars, you have to bleed the engine running. Refer to the vehicle’s technical journal to find out.
3. Determine the wheel bleeding order
You will purge the calipers of all four wheels one after the other. You must first determine the order in which the wheels are to be purged.
Case 1: Apply the Z-diagram
Usually you start with the wheel furthest from the master cylinder. So the classic pattern is:
– right rear wheel;
– left rear wheel;
– front right wheel;
– front left wheel.
This order is called the Z-scheme.
Case 2: Follow another pattern
Brake bleeding can also be done in an X pattern or in another order.
Check the order recommended in your car’s technical journal before starting the operation.
4. Bleed the wheels
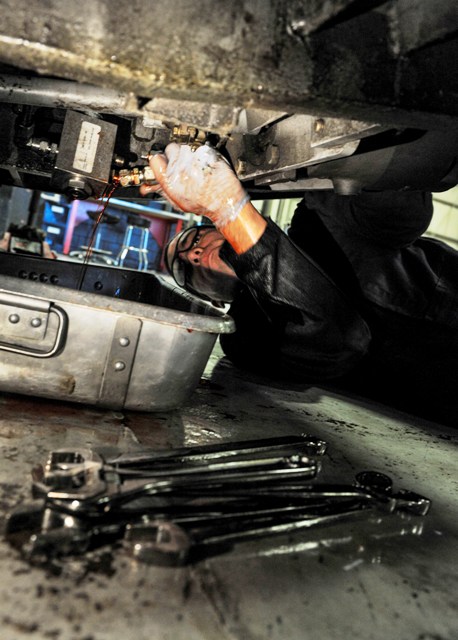
Good to know: At this stage, ask someone for help. He or she will depress the brake pedal while you bleed the brake calipers on each wheel.
Begin by bleeding the caliper on the first wheel in the order you determined in the previous step.
Install the bleed hose.
Start by cleaning the brake caliper.
Place a container with a few centimeters of new brake fluid at the base.
Remove the rubber cover on the bleed screw.
Put a transparent rubber hose, such as an aquarium hose, on the bleed screw. The other end of the hose goes into the brake fluid at the base of the container.
Bleeding the brake fluid.
Hold a flat wrench, ready to open the bleed screw.
Have the second person gently depress the brake pedal and then hold it down when it becomes hard.
Open the bleed screw by turning a quarter turn. The brake fluid flows into the hose, along with any air bubbles.
Good to know: during the flow, the brake pedal will sink. Your assistant will continue to hold it down.
Ask him or her to pump the pedal two or three times and then always keep it pressed.
When pumping, make sure that the jar is always sufficiently full. Put brake fluid back into the canister about every 3 pedal strokes.
Important: When the brake pedal is released, brake fluid from the master cylinder canister enters the system. You must therefore fill this reservoir to prevent a new air inlet and have to start all over again.
When no more air bubbles come out of the bleed screw, close it again.
Your assistant can then only release the brake pedal.
Important: Do not release the front pedal as air may enter the system through the hose. The few centimeters of brake fluid at the bottom of the container into which the hose is inserted will prevent this: if the pedal is released, fluid will rise, not air.
Empty the hose into your reservoir before disconnecting it.
Repeat these operations for the other 3 wheels, respecting the bleeding order established beforehand.
Good to know: there are brake bleeders that allow you to bleed the brakes without the help of a person, by putting the brake system under constant pressure.
5. Check that your brake pedal is no longer soft
After bleeding all four brake calipers and tightening all bleed screws, depress the brake pedal again and check that no fluid comes out.
Then turn the four wheel hubs one by one by hand. Make sure that the hub comes to a clean stop when you depress the brake pedal.
Reassemble the wheels and re-test the braking in real-life conditions. First start driving for a few dozen meters.
Important: Your brake pedal must be hard again.
Finally, collect and dispose of the bleed brake fluid at the rubbish tip.
Important: it is a substance that is very harmful to the environment. It cannot be poured into a washbasin or rubbish bin.
6. Make a diagnosis if the brake pedal remains soft
If the problem persists, there are several avenues to consider:
– Repeat the purge several times. Air bubbles may be trapped in the circuit.
– There may be a leak in the brake system: Check the hoses, calipers and brake drums on the wheels.
– This may also be due to an ABS problem.
– The master cylinder may need to be replaced.
Under such circumstances, you will need brake repair at a professional auto maintenance and repair shop. So, if you are in Kissimmee, you can get in touch with Xtreme Motor Works.
1 comment
[…] may choose the best gear based on engine speed. When the brakes are hot, never sit with the brake pedal in one […]