
Contents
– Zoom in on the ignition coil
– Step 1: Diagnose the problem
– Step 2: Replace the ignition coil
– Step 3: Validate the ignition coil repair
The ignition coil is one of the most critical parts of the engine’s operation. It is essential to first diagnose the problem before considering a coil replacement.
If a coil change is necessary, it is not particularly difficult if you proceed methodically.
Important: the coil is a high voltage transformer that can deliver up to 30,000 V in the latest models. An electric discharge can be dangerous for the operator. Certain precautions are therefore necessary.
Follow this step-by-step guide on how to change an engine ignition coil.
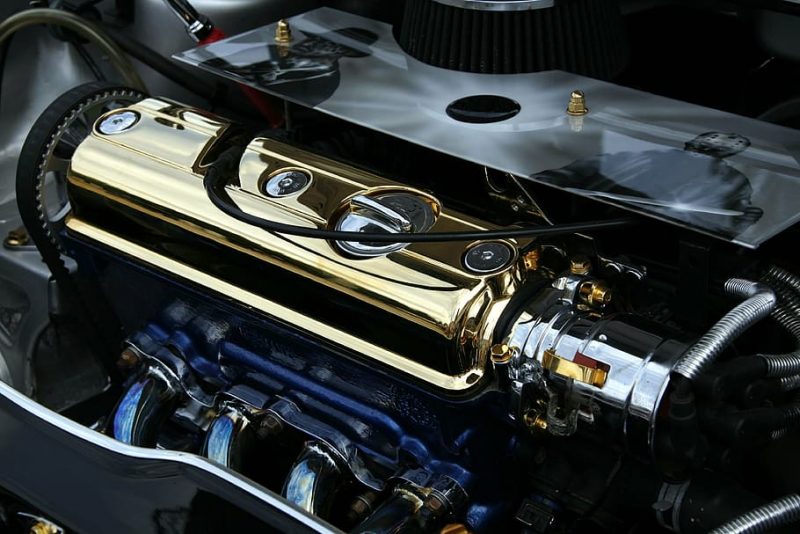
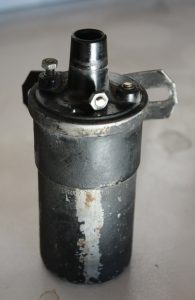
Zoom on the ignition coil
Role of the ignition coil
The ignition coil has a crucial role in the functioning of the gasoline engine.
Good to know: the ignition coil does not exist on diesel engines.
– The coil delivers a spark to the spark plugs in the engine cylinders.
– This will allow combustion to start.
How it works

An ignition coil consists of two parts:
– a primary coil supplied with 12 V. The cut-off of the electrical supply to the coil, by controlling the ground with a mechanical system (breakers-capacitor) or electronic (ECU-sensor TDC assembly), allows the spark to be produced at the spark plug);
– a secondary winding connected to the cylinder spark plug. It allows the voltage to be reduced (from 15,000 to 30,000 V depending on the coils) to improve the quality of the spark.
Three generations of coils
There are three main types of coils linked to the technological evolution of cars.
– The ignition coil associated with an ignition distributor (type 1)
◦ It has a high-voltage output connected to an igniter head that alternately distributes the spark to each cylinder in the engine’s operating order.
◦ This type of coil has practically disappeared nowadays. It exists only on very old models.
– The jumostatic coil (type 2)
◦ It consists of two coils joined together (for a 4 cylinder engine).
◦ Each coil simultaneously delivers two sparks to two cylinders (therefore a lost spark), alternately for cylinders No. 1 and 4, and for the group of cylinders No. 2 and 3.
◦ It comes in the form of a coil block with 4 high-voltage outputs, connected by 4 wires to the spark plugs, or in the latest versions, by a block that directly caps the spark plugs on the engine.
– The single-pole coil (type 3)
◦ This type of coil equips the latest generations of gasoline engines.
◦ Each cylinder has its coil directly capping each spark plug.
The symptoms of coil malfunction
Several cases exist.
– The vehicle does not start at all.
– The vehicle starts “limping,” and obviously, one or more of the engine’s cylinders are not working. The car does not develop its full power.
– Under certain circumstances, such as full load (accelerator pedal on the floor and low engine speed), misfiring occurs.
If such faults occur, check that the coil is the cause.
1. Diagnose the problem
Important: To avoid direct contact with the high voltage wires or coils while the engine is running, use high voltage wire handling pliers to diagnose.
Important: During the test phase, a ground connection is always provided before the coil sparks. This avoids the risk of overvoltage, which could affect the engine management module and destroy it.
Case 1: Check the type 1 ignition coil
There is a quick way to check the coil.
– Disconnect the high voltage wire from the coil on the ignition head side.
– Connect a spark plug to its end, the body of the spark plug being connected to the battery’s ground terminal by a cable with a large cross-section (a jumper cable, for example).
– Turn on the ignition key.
Good to know: if you observe a spark at the spark plug, the coil cannot be incriminated.
– If there is no spark, refine your diagnosis: turn on the ignition and check its two power supply terminals with a multimeter.
– Check that one of them is supplied with + 12 V.
Good to know: if this is not the case, the failure is not attributable to the coil.
For an accurate review, continue the tests on the disconnected coil.
Check the primary winding resistance (between the + and – inputs of the coil) with a multimeter (value to find: 0.6 Ω).
– Check the resistance of the secondary winding, the connection points being one of the two outputs of the primary winding (+ or – ) and the upper high voltage output (value to be found: from 6 kΩ to 9 kΩ).
Reminder: 1 kΩ = 1000 Ω.
Case 2: make a diagnosis on a type 2 coil
– Perform a quick and straightforward first check.
◦ For wire versions, successively connect each high voltage wire to a spark plug.
◦ For one-piece models, remove, and layout 4 spark plugs connected to the ground.
◦ Drive the motor to the starter to check for sparks.
– As with the type 1 coils, check for a 12V supply at the coil connector once the ignition is turned on.
– Check the resistance of the primary winding between the + and – of the coil.
Good to know: in this case, there are two separate ground outputs for cylinders 1-4 and 2-3.
– Also, check the secondary winding in 2 phases.
◦ Check the resistance between high voltage outputs 1 and 4.
◦ Then test between outputs 2 and 3 (values are approximately the same as before).
Case 3: check a type 3 coil
– The symptom being an operation on 3 cylinders, engine running, disconnect one by one the electrical connectors of each coil
– Detect if a coil is defective: when it is disconnected, it does not cause an additional drop in speed.
Good to know: disconnecting the connector of a coil creates a fault recorded in the ECU memory. It will then be necessary to erase the fault.
– Also, check the primary winding resistance (find a coil in good condition: 0.6 Ω).
– The control of the secondary winding is often not possible.
2. Replace the ignition coil
Case 1: replace a type 1 coil
This coil is often attached to a wall in the engine compartment.
– Disconnect the high voltage wire.
– Disconnect the + and – wires from the primary circuit.
– Remove the fixing screws.
– Replace the coil and proceed in the opposite way for the installation.
Case 2: Change a type 2 coil with high voltage wires
– Locate the high voltage wires on the coil beforehand.
– Disconnect the electrical connector from the coil.
– Remove its fixing screws.
– Change the coil and proceed in the opposite way for the re-installation, respecting the positioning of the high voltage wires.
Case 3: replace a type 2 monobloc coil
– Remove the cover covering the top of the motor if it exists.
– Disconnect the electrical connector from the coil assembly.
– Remove the coil block fixing screws (between 2 and 4 screws depending on the model).
– Pull the assembly vigorously upwards to disengage it from the spark plugs.
– Take a new coil and proceed in the opposite way for the installation.
Good to know: make sure that the coil assembly clicks into place on the spark plugs.
Case 4: Changing a type 3 coil
– Remove the cover covering the top of the motor if it exists.
– Disconnect the connector of the offending coil.
– Pull the coil out of the spark plug.
– Replace it and proceed with the reverse operations for removal.
Good to know: it is often recommended to change all the coils (the malfunction is sometimes due to a series of defective coils installed initially).
3. Validate the repair of the ignition coil
Verify that the symptoms have disappeared:
– Start the vehicle and check the coil(s) for proper operation.
– Since some failures are fugitive (i.e., they do not occur constantly), perform a road test to validate that there is no malfunction.
Clear Fault Codes
If fault codes have appeared with the failure or while handling the coil(s), you must erase them. Do this yourself with a diagnostic tool.
Good to know: you can now find basic tools or software on the Internet for as little as $50.
– Plug the device into the diagnostic socket, with the ignition switched on.
– After selecting the vehicle model, enter the “Fault code reading” pane to read the fault(s) displayed.
– Exit this pane and select “Clear Faults”.
– Go back to “Read Trouble Codes” and check to see if the fault has been cleared.
– Close the open pages and disconnect the diagnosis device.
Good to know: the other possibility is to entrust the deletion of defects to a professional.
Materials needed to change an engine ignition coil.
| Starting cables | From $10 onward |
| Hexagonal wrench | From $2 onward |
| Spark plug wrench | $2 |
| Multi-meter | From $10 onward |