Swirl marks are more than just unsightly blemishes on your vehicle; they represent a deeper issue with your car’s paint protection. As the sun shines down on your car, those fine circular scratches can gleam and distress, making even the most polished rides look lackluster. Understanding paint correction—the method to eliminate these marks—can be transformative for your vehicle’s appearance. Through a systematic approach involving various polishing stages, you can restore that showroom shine, safeguarding your investment against further deterioration.
What Are Swirl Marks and How Do They Form?
Swirl marks are tiny scratches that mar the clear coat of your vehicle’s finish, often unseen until the light catches them just right. Commonly caused by automatic car washes using abrasive brushes or improper hand washing techniques, these marks can accumulate over time due to environmental factors and wear. The impact of DMV weather conditions—with hot, humid summers in Maryland and icy winters in Virginia—accelerates this deterioration, making swirl marks a persistent issue for local drivers. Understanding this damage is the first step toward your vehicle’s restoration.
The Importance of Paint Thickness
Before diving into paint correction, assessing your car’s paint thickness is crucial. Most swirl marks reside within the clear coat, a protective layer typically 50 to 100 microns thick. The correction process involves carefully removing a thin layer of this clear coat, thus ensuring that the underlying color remains intact. Among fellow vehicle owners, a common misconception is that all paint damage requires repainting; however, most surface defects can be resolved through controlled abrasion methods.
Understanding Polishing Stages in Paint Correction
The art of paint correction relies on identifying the appropriate polishing stage based on the depth of the paint damage. Here’s a breakdown:
| Stage of Correction | Level of Abrasiveness | Defects Tackled | Ideal For |
|---|---|---|---|
| One-Stage | Medium | Minor swirls, slight hazing | Well-maintained vehicles, pre-coating preparations |
| Two-Stage | Compound + Polish | Medium swirls, light scratches, early oxidation | Everyday vehicles with 2–5 years of wear |
| Three-Stage | Heavy Compound + Polish + Finish | Deep scratches, severe oxidation, water etching | Neglected paint, restoration, show cars |
Choosing the Right Stage for Your Vehicle
Many vehicle owners mistakenly opt for the incorrect stage of correction. For light to moderate defects, a one-stage correction leverages a medium-cut polish that effectively restores a healthy gloss while removing minimal clear coat. Conversely, if your vehicle shows deep scratches or severe oxidization, a more intensive approach utilizing a three-stage correction is essential, combining cutting, polishing, and finishing for optimal results.
The Process Behind Paint Correction
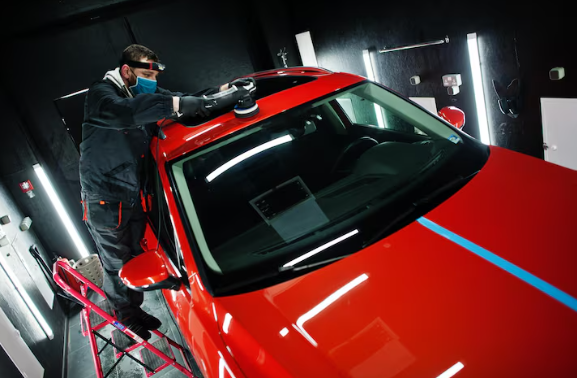
The paint correction process largely involves three fundamental steps: cutting, polishing, and protecting. Initially, a cutting compound addresses the deep defects; next, a polish refines the surface, eliminating haze and micro-scratches from the compound stage. Finally, a finishing polish enhances the paint’s overall gloss before applying a protective layer.
For those considering DIY options, modern dual-action polishers have made this more accessible than ever. However, caution is advised; using products improperly can lead to further issues, such as burning through the clear coat. If you’re unsure, consulting a professional technician is often the safer choice to achieve a flawless finish.
The Role of Protection After Correction
Once paint correction has been completed, applying a protective layer is key for maintaining your vehicle’s glossy appearance. Options such as wax, sealants, or ceramic coatings provide a barrier against environmental damage. The latter, especially, can significantly extend the life of your paint treatment, bonding to the surface and creating a hydrophobic effect that repels contaminants.
- Regular maintenance washing is crucial to prolong the results of your paint correction.
- Utilize the two-bucket wash method to prevent new swirl marks.
- Consider using a ceramic coating for long-lasting protection against UV rays, dirt, and grime.
For comprehensive paint correction and a follow-up ceramic coating, explore services available at professional detailing centers to revive and protect your vehicle’s paint. Your investment deserves the best care!